Polestar Forum banner

The 12 V battery and under hood fuse box

26K views 39 replies 16 participants last post by  Ding_1999  
#1 · (Edited)
All electric cars, counter-intuitively, have a 12V, conventional, car battery. This allows the car to use conventional parts for all the auxiliary widgets and bits that have been developed over the decades for ICE cars. It's also needed to disconnect and isolate the main, high voltage battery by manipulating contactors and more.


There are known issues for which the solution is to temporarily disconnect the 12V battery or to boost or charge the 12V battery.

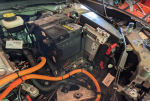
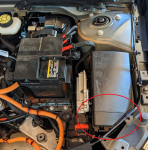
Since I had all the plastic bits out, and since the good doctor Polerad asked, I thought I'd post some observations about the 12V battery and the nearby fuse box.

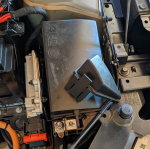
First, you need to remove those plastic bits: Getting under the Frunk, for the timid... with pictures.

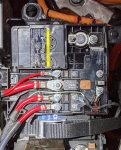
Once that's done, here's the 12V battery (green circle) and its neighbor, the fuse box (red ellipse).
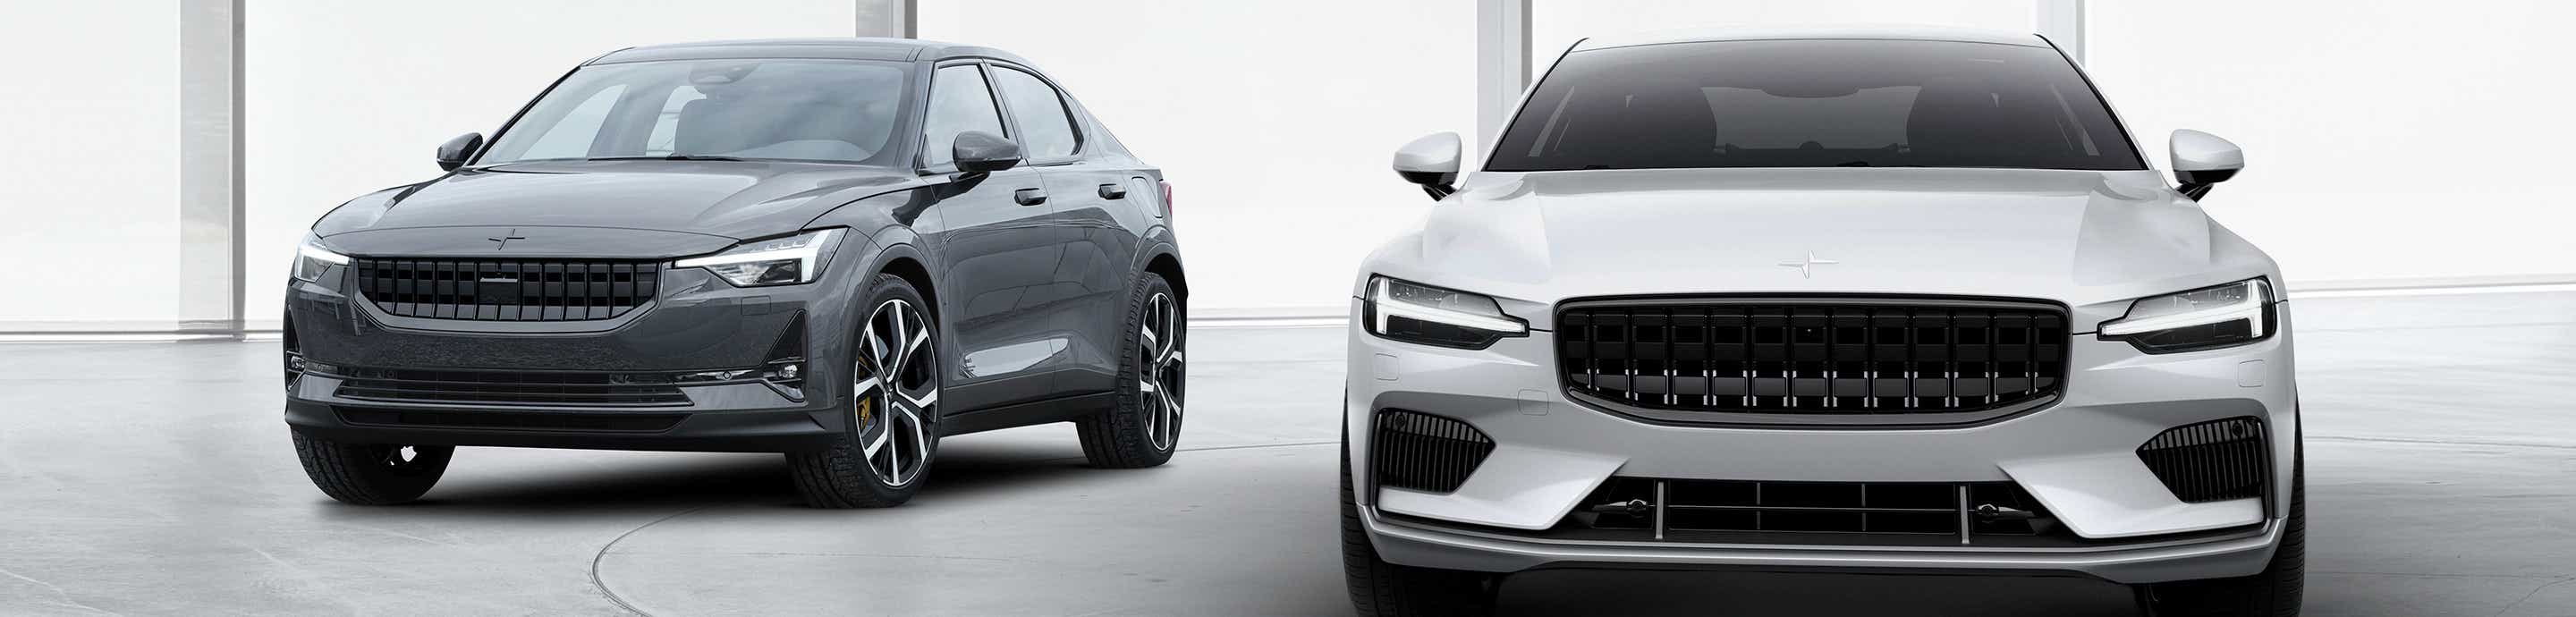
7205
 

Attachments

#2 ·
Now I have to warn everybody that messing about with an electrical system has its inherent risks and if you accidentally or intentionally connect things in the wrong way, you can really muck up the works. In addition to, perhaps, frying the electrical system or wrecking really, really expensive computer parts which you might not be able to replace anytime soon, there's a physical risk of hurting yourself by electrocution, burns, or even an explosion if there is hydrogen gas lurking about the 12V battery. Ok? Don't faff about here unless you're confident in what you're doing.
 
#3 · (Edited)
Ok... the fuse box first.

There's a small plastic cover (red ellipse) with a single locking tab (green ellipse). Press the tab in with your finger and the small cover is easy to remove.

7207


Removing the cover exposes a positive 12V terminal. (I measured 12.87 volts with the car "off" when referenced to the negative terminal of the battery.)

There then are 3 more tabs (red circles) that are easy to press in to remove the fuse box cover.

7209


7210
 

Attachments

#4 · (Edited)
Ok... now the 12V battery.

There's a cover over the battery that has two hinged flaps. The forward flap has a first-aid cross on it. By lifting the tab, you can lift this up to expose the connection between the 12V battery and the other cables connected to it.

7211


7212


When I first posted this thread, I said that If I were to disconnect the car from the 12V battery, this would be where I would do it. Since that time, multiple forum members have said that it's better and safer to disconnect the negative terminal. So don't disconnect this at all, but if you insist (perhaps to change the battery), don't disconnect this until you disconnect the negative terminal. More on that later.
 
#5 ·
There's a second hinged cover that's a little harder to open. The plastic latches are designed to be pried back with a rather small, flat-blade screwdriver. You insert the blade into the lip and then fulcrum the screwdriver gently back to pull the loop out from under the hook.

7213


There are two of these. The obvious one shown here, and another around the back. I find a good headlamp to be a most valuable tool and this is a place where it really comes in handy. Pull that second tab, and this cover hinges up to expose wires that need to be hot (connected to positive 12 volts) all the time.

7214
 
#32 ·
There are two of these. The obvious one shown here, and another around the back. I find a good headlamp to be a most valuable tool and this is a place where it really comes in handy. Pull that second tab, and this cover hinges up to expose wires that need to be hot (connected to positive 12 volts) all the time.

View attachment 7214
4 Positive terminals? If I were to buy and install on of those 12 battery monitors which one of those is the one to hook up to or hook up one of those 12v jump starter batteries. Clearly, judging from my question I shouldn't be attempting either but it would be nice to know which is which
 
#6 ·
At this point, if you open both flaps and then one of two remaining tabs around the back, you can lift off the entire piece which exposes some high amperage fuses below.

7215


You can see a "mega" 175 amp fuse, a 125, 100, and 60 amp fuse here. There's also a 15 amp fuse off to the side.

7217
 

Attachments

#7 · (Edited)
And, of course, near the back, is the connection to the negative terminal of the battery (red ellipse).

7218


This is where multiple forum members have assured me that it's best to disconnect the battery if you're going to do a 12V disconnect. Note that it's not under covers and the nut is angled for easier removal. If you loosen the angled nut, you should be able to carefully lift the connector off the negative stud and then insert some substantial insulating material between to make sure no connection will inadvertently occur.
 
#8 · (Edited)
Now I didn't want to disconnect my 12V battery and I have no training or reliable information from other sources as to how best to do this. That being said, forum members have assured me that the way to do that is to disconnect the negative terminal first. If, for some reason, after disconnecting the negative terminal, you still need to disconnect the positive terminal, I think I would first remove the two fasteners (green circles) that hold the plastic panel and cover to the battery, and then I'd remove the nut that makes the connection to the fuse panel (red circle). From what I can see and after probing around a bit, I think this would allow me to lift the metal fuse panel off the threaded stud thus disconnecting the 12V battery from the car.

7219
 
#9 ·
I was 21 years old messing about with my first car... a used 1974 AMC Ambassador station wagon... to install my own after-market stereo system (cassette tape player deck!!) when I discovered something about cars and electricity. You can touch a 12V terminal with your hand and not get shocked. 12V isn't much incentive to force electricity through your body so as you'd notice. But if you happen to connect a 12V battery to ground with something like a screwdriver, you realize it's not good. There is buzzing and flame and heat and arcing and welding and smoke and... well... it's very bad indeed.

So... once again, I am compelled to warn everybody who bounces across this thread that things can go wrong very quickly when you're playing with electricity. You could wreck your car and you could wreck yourself. So please don't try anything based on the information I've posted here. Find good, reliable information from Polestar or Volvo or a trusted mechanic. Then go double-check everything. OK?
 
#10 ·
And just so no one tries it, if you suspect your battery may be bad, never connect jumper cables to both the + and - terminals since there could be explosive gas hanging around where you don't need a spark.

And taking any of those leads off the battery without ensuring they don't touch each other, or something they shouldn't, could destroy some electrical or computer component of your car.
 
#15 ·
The reason to ALWAYS disconnect the negative terminal first is that all metal on the car is connected to the negative. It is easy to cause a short with your spanner when you disconnect the positive with the negative still connected. Shorting a battery like that might very well weld your key in place.

Some UK cars from before 1950 might be the other way, with the positive terminal connected to the car body.

Of course we are talking auxiliary battery. The traction battery is isolated both ends.
 
#16 ·
Thank you Herr @ProfessorCook !
For folks who have done the 12V disconnect to good results, is this what you did? Or did you disconnect at the neg terminal - red ellipse #7 ?
@kkonstan I think you've done this?

I'm weighing the pros/cons for waiting out 1.5 weeks to take the car in, vs trying this out and hopefully getting functionality back for the intervening 2 weekends and my commute. Also not potentially electrocuting myself is a factor given my autoEMP tendencies.
 
  • Like
Reactions: ProfessorCook
#17 ·
Just to second what @EV1 says.

To disconnect the 12v battery, do so by disconnecting the negative terminal. Negative should always be the first to disconnect and last to connect for the reasons already highlighted, far less risk of accidents.

It has even been designed with easy disconnection in mind. The negative terminal is not under any cover and the bolt is even angled towards a convenient direction for tool access. Then you aren't wrestling with that whole busbar setup. @polerad this is how I have isolated that car before.

I would even go so far as to recommend that @ProfessorCook modify or remove his recommendations as to how to disconnect the battery. There is a risk that an otherwise very nice guide gets improperly used potentially for years to come.
 
#18 ·
I would even go so far as to recommend that @ProfessorCook modify or remove his recommendations as to how to disconnect the battery. There is a risk that an otherwise very nice guide gets improperly used potentially for years to come.
'Very good idea, sir. Thank you. I have edited the previous posts. If you get a chance, I'd appreciate you having a look at them to see if you think I've made things better and clear now.
 
#20 ·
Good news, bad news:

Good news - disconnecting the negative terminal is totally easy. I managed to do it just now and not electrocute myself.
Just get the 4 push button rivets out to take off the top panel (really could do it with 2 out and lift the plastic on the appropriate side). Then loosen the fastening nut on the negative terminal and lift it off - do it in one motion so it doesn't contact/recontact a bunch as I'm guessing that's bad. Then when ready do the reverse to reconnect everything.

Bad news - My connectivity is still completely broken. With the negative terminal disconnected the car was entirely dead and unresponsive. So that part worked. And after waiting in that state 5 min, when I reconnected everything started up again.... but no internet. My time/date settings were all off (it thought it was in a different time zone 2 days back!) and I'm guessing some other stuff is off too.

Ah well.... 1.5 weeks to go until my service appt....
 
  • Sad
Reactions: rgledhill and Mick
#22 ·
Good news, bad news:

Good news - disconnecting the negative terminal is totally easy. I managed to do it just now and not electrocute myself.


Ah well.... 1.5 weeks to go until my service appt....
Well... At least you gave it a shot and we all know now how to do it.

Good luck with the rest.
 
#25 ·
Even if you get to the fin, the battery is inside, so far as i'm aware it's not possible to disconnect the backup battery, it has to be reset by software access.

Also, the headliner shouldn't be glued in, it will be clips... you're probably not pulling in the right direction or hard enough, or both.
 
#31 ·
Prof thank you very much for a fantastic right up you’re a bloody star. My car wouldn’t start for a quick morning trip to the airport tomorrow and with your write-up I was able to get this far in the dark keep your fingers crossed it starts thanks again 🙏

Image

Whilst battery is disconnected I think I need a coffee if I’m gonna put it back together again I thought 30 minutes disconnection will do it.
Image
 
#37 · (Edited)
It was getting late - (5am airport trip this AM) so after a short trial jumping it with this I gave up. After getting back home Volvo assist came & jumped it with a bigger battery - for longer and the 'updated the software.' It's still showing 1.7 but now works. Cables are long enough to reach the earth & +ve (as chosen below) under the frunk.

Image